Joined: 09/11/2004(UTC)
Posts: 2,346
Location: Longueuil, Quebec
|
Hello, I have recently bought a Pullman Heavyweight 12-1 Sleeper of Branchline Trains. This nice passenger car is member of the Branchline's Blueprint series. I have selected a sleeper kit in the livery of the Canadian National Railway (CNR) which has the reference # 5326 :  As usual, I will share with you the assembly of that car and its conversion to the Märklin AC system. At the moment, I absolutely don't know the issue of this ... A picture of the box, first : 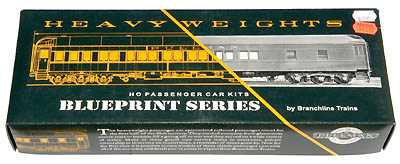 The kit contains a lot of parts attached to several colored sprues. Sides of car are already painted to the selected railroad company livery. Picture shows some of the parts of the kit. Not all parts are present on the picture : 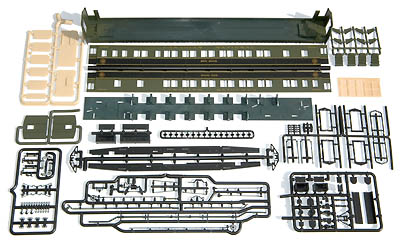 Construction will now start very soon. Pierre.
|
|
|
|
|
|
 Joined: 21/10/2004(UTC) Posts: 31,697 Location: United Kingdom
|
Good luck to work on kit,Keep psted soon.  |
Large Marklinist 3- Rails Layout with CS2/MS2/Boosters/C-track/favorites Electric class E03/BR103, E18/E118, E94, Crocodiles/Steam BR01, BR03, BR05, BR23, BR44, BR50, Big Boy. |
|
|
|
|
|
Joined: 09/11/2004(UTC)
Posts: 2,346
Location: Longueuil, Quebec
|
I worked a little bit on this project ... Prior starting the assembly, I covered the underside of the car with a PolyScale matt varnish F404106. I then glued the transparent parts with Humbrol's Clearfix and assembled both sides of the car as indicated in the instruction sheet.  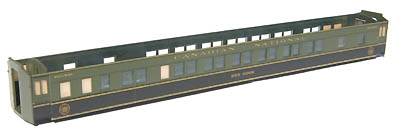 In the meantime, I also have started to paint the interior. Pictures will follow ... when dry ! Pierre.
|
|
|
|
|
|
Joined: 21/10/2004(UTC) Posts: 31,697 Location: United Kingdom
|
Very good,keep posted soon. |
Large Marklinist 3- Rails Layout with CS2/MS2/Boosters/C-track/favorites Electric class E03/BR103, E18/E118, E94, Crocodiles/Steam BR01, BR03, BR05, BR23, BR44, BR50, Big Boy. |
|
|
|
|
|
Joined: 09/11/2004(UTC)
Posts: 2,346
Location: Longueuil, Quebec
|
Thanks Steven.  Prior the installation of the underboddy accessories, a light dry-brush has been applied with PolyScale "Dirt" # F414308 in order to highlight details.  Interior parts have been treated simultaneously with a Tamiya Grey Primer after that the molding imperfections have been corrected with Tamiya Putty. The following paints have been then used : - Partitions and walls : Humbrol # 10. - Floor : Humbrol # 66. - Seats : Humbrol # 62. Other colors maybe of course be used. 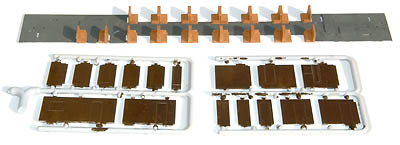 Once all parts dry, interior has been assembled. Attention must be paid to the position of the partitions.   To be continued ... Pierre.
|
|
|
|
|
|
Joined: 12/05/2005(UTC)
Posts: 1,908
Location: Stockholm, Sweden
|
This looks great Pierre!
Your pictures and projects are a serious threat to my wallet [:p][}:)] |
|
|
|
|
|
|
Joined: 09/11/2004(UTC)
Posts: 2,346
Location: Longueuil, Quebec
|
... So, let's go further away ! All accessories intended to the car underboddy were first painted with the PolyScale matt varnish F404106. Both sills were then drybrushed still with PolyScale "Dirt" # F414308, trimmed and adjusted sothat they could precisely fit in their respective slots. One of the sills has a cut corner to avoid confusion with the other-one. It is important to check the intended place of each sill. Accessories were then glued onto the sills and drybrushed as well.  In the meantime, the steam pipe and both brake rods were glued on the car and drybrushed still with PolyScale's Dirt.  Once everything was dry, both sills have been installed on the car.  Pierre.
|
|
|
|
|
|
Joined: 19/11/2002(UTC)
Posts: 378
Location: Leuven, Belgiium
|
Lovely work, Pierre !! I like the way you master the painting ! Very realistic ! Wonder how this coach will end  Bob
|
|
|
|
|
|
Joined: 09/11/2004(UTC)
Posts: 2,346
Location: Longueuil, Quebec
|
Further work completed this week ... Steps have then be installed without any difficulty as per the instruction sheet. 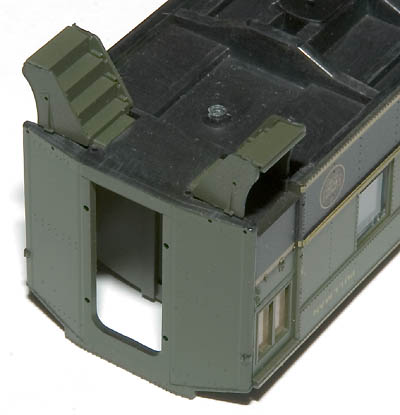 All truck parts excepted the axle caps were first treated with PolyScale matt varnish F404106 as usual. Assembly of both trucks occured as indicated in the instruction sheet. However, four cuts have been carved where pointed by the arrows in order to allow the outer wheels to turn without rubbing. Original wheels were replaced by six Märklin's # 700190. They turn very nicely without any further modification. Trucks were then drybrushed with PolyScale "Dirt" F414308 in order to mark reliefs. 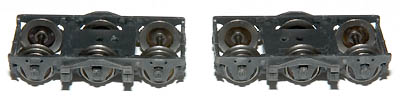 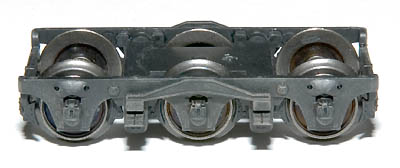 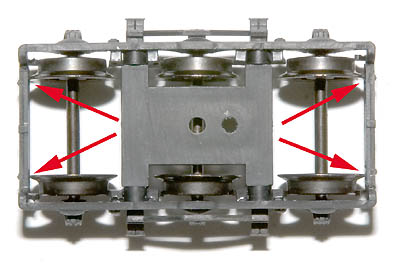 The car will be able to take R5 curves only if it is not modified. But if cuts are carved on the sills where pointed, it will be possible for the car to take R3 curves. The cuts are intended to give more room for the inner wheels sothat the trucks can further rotate. Once painted and covered with a matt varnish, these cuts will no longer be visible when the trucks are installed. I will later propose a suggestion of modification in order to take R2 and even R1 curves. 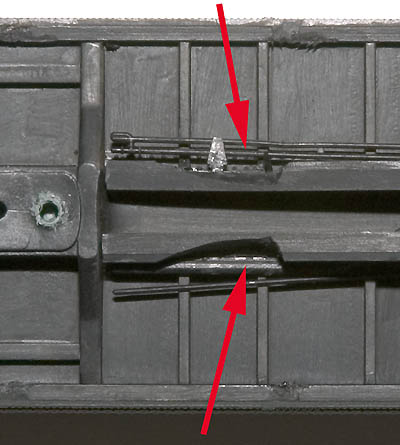 To be continued ... Pierre.
|
|
|
|
|
|
Joined: 21/10/2004(UTC) Posts: 31,697 Location: United Kingdom
|
look great Pierre. |
Large Marklinist 3- Rails Layout with CS2/MS2/Boosters/C-track/favorites Electric class E03/BR103, E18/E118, E94, Crocodiles/Steam BR01, BR03, BR05, BR23, BR44, BR50, Big Boy. |
|
|
|
|
|
 Joined: 22/04/2004(UTC) Posts: 12,139 Location: New York, NY
|
Cool job, Pierre - congratulations [:p]!
(I'd never have your patience for such extensive mod jobs ... [:I])
|
I hope no one visits a poor Southener's layout in Brooklyn. Intruders beware of Gators.
AT&SF, D&RGW, T&P, SP, WP, UP, BN, NYC, ARR, epI-III - analog & digital Marklin Classics only.
CU#6021 FX-MOTOROLA DIGITAL SYSTEM. Fast as lightning and no trouble. What else ...
Outlaw Member of BIG JUHAN's OUTSIDER CLUB. With the most members, worldwide
|
|
|
|
|
|
Joined: 09/11/2004(UTC)
Posts: 2,346
Location: Longueuil, Quebec
|
Last run to the finish line ... Air conditioning and other details have then be prepared, sanded, painted and weatherized. For this Canadian National sleeper, it was suggested to install the 3410 Ice Air Condtitioning system. I have used Tamiya putty, Tamiya X-1 Black paint, PolyScale matt varnish F404106 and "Dirt" F414308, this last-one as dry-brush.  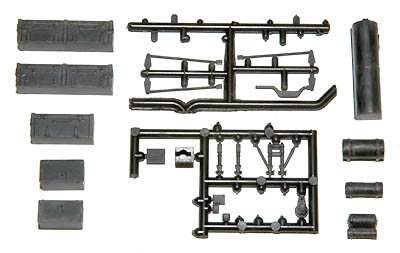 Coupler boxes have then be assembled. Both couplers that were provided with the kit were replaced by two Kadee # 5's. Holes have been slightly filed and tips of both return spring branches cut a little in order to improve swinging of the assembly. All parts were previously treated with PolyScale F404106 matt varnish. Air hoses have to be manipulated very carefully because they are very fragile. A Polyscale F404308 "Dirt" dry-brush has been applied once both coupler boxes and their accessories were assembled.  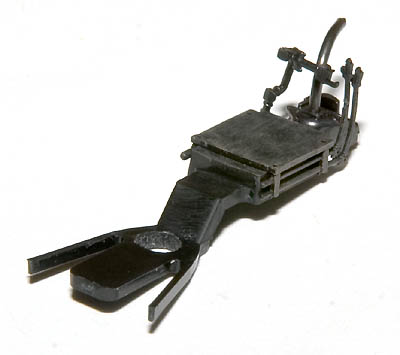 Coupler assemblies, trucks, air conditioning parts and all other accessories have been installed as indicated in instruction sheet. All these details definitively give a great realistic touch to that model. 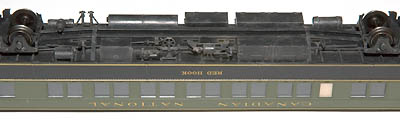 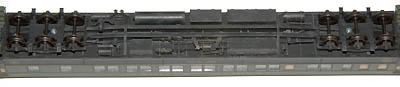 All other details such as diaphragms, grab irons, and cut levers have been added to the car. Metallic grab irons were painted with Tamiya X-1 Black paint. Coupler yokes were not installed in order to allow a full swing capability to the coupler boxes. Details that are provided for this kit are absolutely fantastic ! 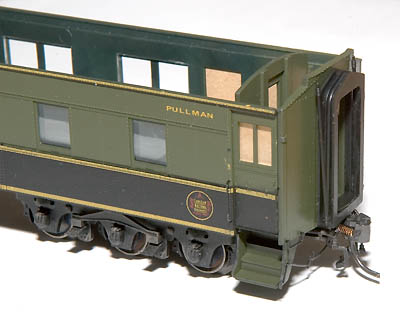 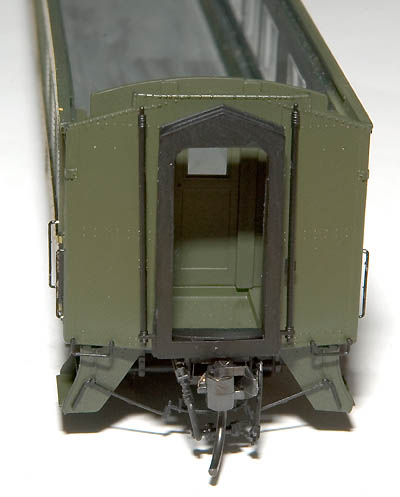 Our GG-1's are now close to get great cars ! Pierre.
|
|
|
|
|
|
Joined: 21/10/2004(UTC) Posts: 31,697 Location: United Kingdom
|
Great Job. |
Large Marklinist 3- Rails Layout with CS2/MS2/Boosters/C-track/favorites Electric class E03/BR103, E18/E118, E94, Crocodiles/Steam BR01, BR03, BR05, BR23, BR44, BR50, Big Boy. |
|
|
|
|
|
Joined: 12/05/2005(UTC)
Posts: 1,908
Location: Stockholm, Sweden
|
|
|
|
|
|
|
|
 Joined: 13/10/2004(UTC) Posts: 2,616
|
Wow,very nice work Pierre How the heck do you make such nice photos. Just like a few other members you seem to be able to make high quality photos. I've still got a lot to learn! Kind regards Guus |
Kind regards,
Guus |
|
|
|
|
|
Joined: 09/11/2004(UTC)
Posts: 2,346
Location: Longueuil, Quebec
|
Thanks for your comments ! Guus : a good lens, a few tricks on Photoshop and that's all ! The last steps now ... Weight has been glued onto the floor of the car. It was painted with the same color as the interior floor, Humbrol grey # 66 in this case. Interior was then snaped into the car without any difficulty. 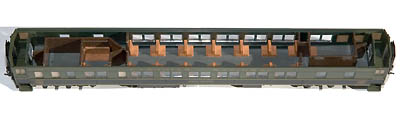 The roof was covered with two layers of PolyScale F404106 matt varnish in order to remove its unrealistic plastic shine. A PolyScale "Dirt" very light dry-brush was then applied. Roof was glued on the boddy with CA glue. This closed the assembly of that beautiful Pullman sleeper. 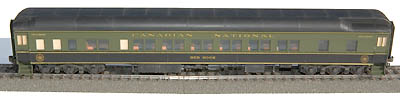 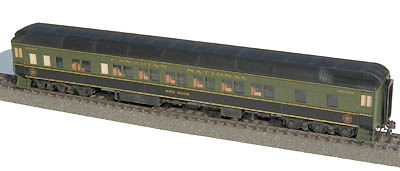 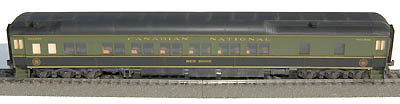 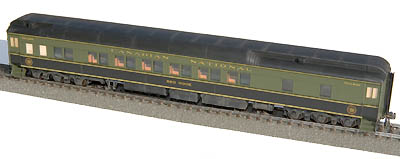 I had promised a suggestion to see that car keeping R2 and even R1 curves, here it is. You will also find a full report on my website both in English and French. At last, I can definitively announce you that the Märklin GG-1's have found suited passengers cars. Here is the proof : 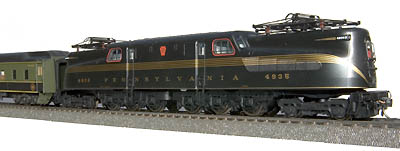 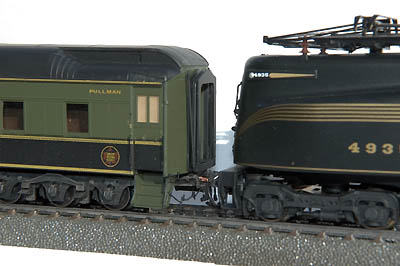 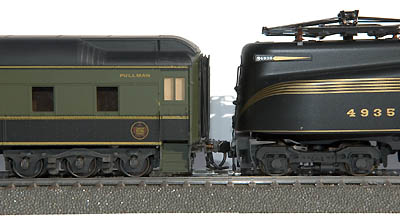 This Branchline Trains Pullman Sleeper is really a great model. It was the fun to assemble it even if I do not recommend this kit to a beginner. Pierre.
|
|
|
|
|
|
Joined: 21/10/2004(UTC) Posts: 31,697 Location: United Kingdom
|
Congratulations Pierre. |
Large Marklinist 3- Rails Layout with CS2/MS2/Boosters/C-track/favorites Electric class E03/BR103, E18/E118, E94, Crocodiles/Steam BR01, BR03, BR05, BR23, BR44, BR50, Big Boy. |
|
|
|
|
|
Joined: 12/05/2005(UTC)
Posts: 1,908
Location: Stockholm, Sweden
|
Great work, as usually, Pierre! |
|
|
|
|
|
|
Joined: 21/07/2003(UTC) Posts: 1,358 Location: Houston, Texas
|
Hi Pierre,
But is it absolutely necessary to replace the original wheels with Märklin wheels? That didn't seem to be the case with the Rapido Train models. What happens if I keep the original wheels?
Salutations,
Armando |
Best regards,
Armando García
|
|
|
|
|
|
Joined: 09/11/2004(UTC)
Posts: 2,346
Location: Longueuil, Quebec
|
Quote:[size=1" face="Verdana" id="quote]quote:Originally posted by Armando
<br />Hi Pierre,
But is it absolutely necessary to replace the original wheels with Märklin wheels? That didn't seem to be the case with the Rapido Train models. What happens if I keep the original wheels?
Salutations,
Armando
¡Hola Armando! The answer is YES ! If you don't change RP-25 wheels that are provided with the Branchline kit, the car will probably derail. Note that Märklin wheels # 700190 perfectly fit Branchline trucks with a very slight modification as previously described. Rapido Trains RP-25 wheels have a distance between inner flanks that are slightly less than on other RP-25 wheels hence the fact that they do not derail on Märklin C and K turnouts. I hope that this answered your question. ¡Hasta luego! Pierre.
|
|
|
|
|
|
Forum Jump
You cannot post new topics in this forum.
You cannot reply to topics in this forum.
You cannot delete your posts in this forum.
You cannot edit your posts in this forum.
You cannot create polls in this forum.
You cannot vote in polls in this forum.
