The camera cars from Märklin are very nice, but I like to make things myself, and spend the money I save on locomotives and so on.
My camera car model has no prototype in real life. I imagine that the local railway workshop has made a customised car for a special purpose. That happens from time to time.
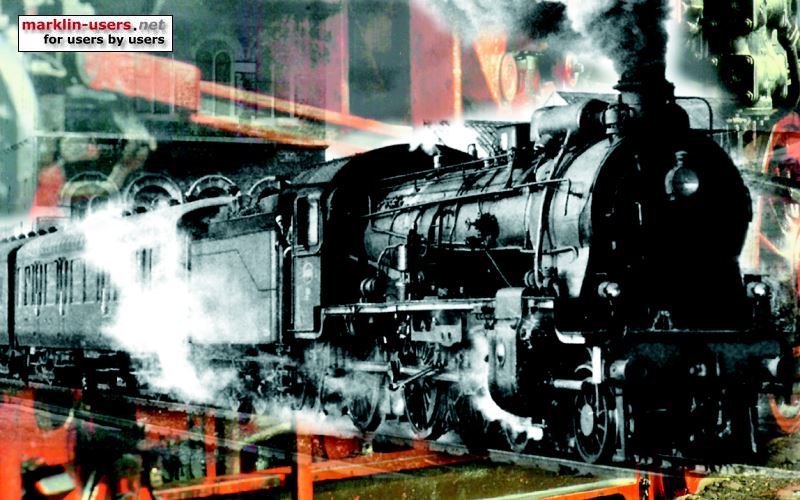
The photo shows the normally camera car setup. Märklin locomotive
37250 pushing the closed freight car 4877 with the camera power supply and the controls, and
in front a 4411 body
shell on top of an open car 4694 housing the camera. The control car
and the camera car are connected with a six-pole current conducting coupler.
The camera car set can of course also be connected other locomotives and trains,
as it has normal Märklin close couplers in both ends.
The camera:
I bought it many years ago on a model railway show outside
Oslo. It is a "Navigator Super Mini wireless CCTV". It came with the
camera unit with charger and a receiver with power supply. The camera unit has built-in rechargeable batteries,
a microphone and a 2,4 GHz transmitter. The receiver is a small white box that can be connected to a
TV with RCA-connectors. A yellow connector for the video signal, a black
one for the sound. I am looking for some kind of converter to connect the
camera to the PC via a USB port.
The camera car, 4694 with a 4411 body:
I was thinking and testing for a long time before settling for
this strange combination, of the flat car 4694 with a 4411 body on top.
The camera is almost as long as the 4411 body. The open area behind the
body gives space for the battery charger connector, to charge the camera
batteries. The car was easily converted to close couplers in both ends, with the long
coupler pocket Märklin part no. 363950. The pocket is required to install the four-pole
conduction coupler from Roco.

A bi-stable relay (in the control car 4877) is connected in parallel with the blue ON and OFF switch. A small "home made" two-pole connector is glued to the rear wall of the camera. The two gray wires are connected in parallel with the switch. This way, when the blue camera switch is OFF, the camera can be turned ON and OFF remotely, for instance from the Märklin Central Station.
The antenna used to be a short rod, screwed into the upper hole on the rear wall. It broke, and I made a wire antenna. The wire length is calculated in relation to the 2,4 GHz frequency.

The 4411 body holds three very bright white 5mm LEDs. The LEDs are controlled with f0 from the 60960 function decoder and stays ON in both driving directions.

This photo shows the three LEDs from inside, with the home made circuit board. The three resistors (on the top of the board for the centre LED) are 1,0 KOhm.
The control car, 4877
I selected this car due to it's sliding doors, the close coupler pockets, and,
maybe most important, that the axels are supported in metal holders. Good
ground contact. It is also rather heavy, a good thing when the locomotive is pushing the train.
I have insulated the metal floor from the axel holders.

The car holds a home made 5 Volt battery charger for the camera and the control system for the camera and the light. The control consists of a 60961 decoder, a two-pole bi-stable relay for camera on/off and a one-pole mono-stable relay for the battery charger.

Photo light ON and OFF:
Controlled with f0. Two wires from the decoder to the four-pole
current conduction coupler:
Wire 1: the Gray and Yellow wires from the decoder are connected together,
so the lamps work in both directions.
Wire 2: the Orange wire from the decoder.
The wires are connected via the relay circuit board.

The red tail lamp is only for decoration, as the hole was already there. The long red light guide to the tail lamp bulb is cut inside the wall.
Battery charger:
Controlled by f1. The current from f1 turns on a mono-stable relay, which sends the
track current to a home made battery charger. The charger supplies 5 Volt DC to the camera,
via an additional two-pole connector on top of the 4-pole current conducting close coupler.
A yellow LED in the control car roof is ON. The cooling fin for the 5 Volt
regulator (7805) is glued to the metal floor of the car (even bigger cooling
surface) and may make electrical contact. The cooling fin is electrically connected to the negative voltage
after the rectifier diodes. Therefore it is important to insulate the floor from the
axel
holders.

The sliding doors are glued in open position, and I have cut a hole in the roof above the cooling fins and one in the back wall of the car, to get a best possible air circulation around the cooling fins for the voltage regulator. During battery charging only, the cooling fin temperature still reaches approx. 40 degrees C, during camera operation it climbs to approx. 62 degrees. Before cutting the holes in the car it was above 70 degrees. The general temperature in the "relay end" of the car has also decreased noticeably after the cutting.

The plug for the charger cable will be inserted in the camera through the door in the rear wall. I am looking for a new plug for this purpose, as the one that came with the 230VAC charger has a too thick and stiff cable for smooth coupler operation. The connector is moulded with the cable, and I want to keep original charger intact.

Camera ON:
Controlled with f2, which is set to be momentarily on, for as long time as the
button is pressed. f3 is off. The pulse from the f2 output moves the
bi-stable relay to one position, making contact between the two "switch wires"
from the camera. The two wires runs via the current conducting coupler.
A green LED in the
power car roof is ON.
Camera OFF:
Controlled with f3, which is set to be momentarily on, for as long time as the
button is pressed. f2 is off. The pulse from the f3 output moves the bi-stable relay to
the other position, opening the connection between the two control wires.
The green LED turns OFF.
The bi-stable relay is selected to be able to keep the camera ON even if the track power supply should be missing. This way it is possible to push the camera cars for instance into a tunnel with no power, for example due to a short circuit made by a derailed train. In this case the battery charger and the light will of course not work. The charger connector must be disconnected from the camera and the camera must be switched on with f2 when the train is on a powered section of the track. Maybe not so practical due to missing light. Or - I have to install emergency light in the tunnels....
The decoder, relays and indicators:

The two cut-outs in the circuit board are for reinforcements inside the car body. The f4 output, brown/white wire, is connected to a yellow smd LED just for fun, as interior light. I had to use f4 fore something...

Pick-up shoe:
The 4877 has no pick-up shoe, so I had to install one. I have a
lot of left-over parts from earlier conversion of different locomotives. I
found a coupler holder from a 3096-type steam locomotive (Br 86) without Telex
couplers, Märklin part no. 230130. This part is also used on the big
steamer 3084. After some cutting, bending and more cutting, it fits under the car
body as a pick-up shoe support. Pushing the support with a soldering iron
it was partly melted into the car body. Add a couple of tiny drops of superglue.

The pick-up shoe support has a treaded hole for the pick-up shoe screw and a
guiding pin. Perfect!
A long pick-up shoe, Märklin part no. 7185, as for instance on a 3000 locomotive, was installed. To be
on the safe side, I will put on several layers of paint on the axel shafts, to
avoid short circuit if the shoe or the shoe spring should hit the axel.
Current conducting coupler:
Roco has a useful four-pole current conducting coupler, Roco part no.
40345.
They come in sets of two coupler, each with four long black wires.

I needed six poles, so I added two more in the top of the coupler. These are for the camera charger.

Wiring diagram:

Circuit board for the charger and relays:

The camera car and locomotive decoder functions, after converting the 37250 to mfx:
| Camera cars and 37250 Werk 1 | |||||||||||
|---|---|---|---|---|---|---|---|---|---|---|---|
| Camera cars, 60961 decoder | Locomotive, mfx decoder | ||||||||||
| Photo light |
Battery charge |
Camera | Interior light |
Light | Interior light |
Shunt speed |
Acc/ dec | ||||
| funct. | dir. | on | off | Front | Rear | ||||||
| f0 | both | on | |||||||||
| f1 | both | on | |||||||||
| f2m | both | if f3 off | |||||||||
| f3m | both | if f2 off | |||||||||
| f4 | both | on | |||||||||
| f5 | forward | on | |||||||||
| reverse | on | ||||||||||
| f6 | both | on | |||||||||
| f7 | both | on | |||||||||
| f8 | both | delay off | |||||||||
Screenshot from my Märklin Central Station1:

The left part is the TV train consist, the right part the TV cars themselves.