|
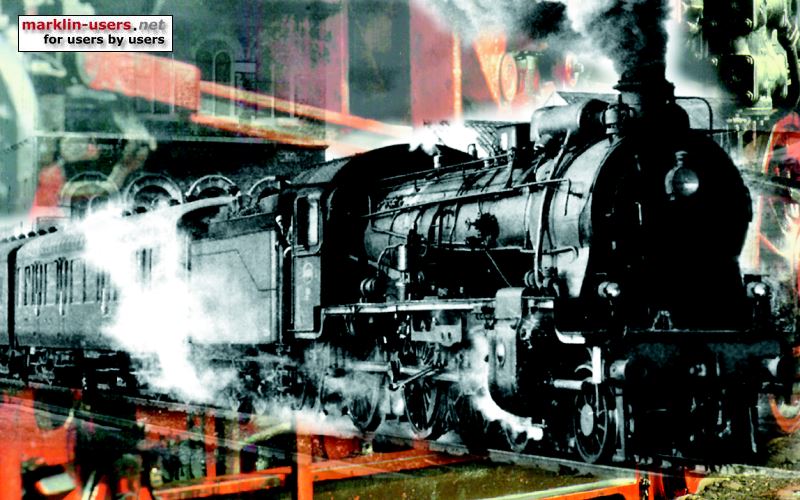
Now it's time to attack the most
expensive parts of our hobby, the locos.... But stay calm,
Kevin also introduces non-destructive methods.... Start by
looking at the difference between a weathered and a non-weathered
loco.. A dirty black one in the foreground, and a grey one with
shiny valve gear behind it.... Which looks closest to the
prototype ???

Introduction to this chapter
Our next installment in our "Weathering school for dummies"
is locomotives. Now I know some are a bit intimidated to 'ruin' there
locs, but I will first discuss how to do easy 'removable' weathering, so
that if you don't like the results they can be removed to start over or
to bring the
model back to it's original condition. Although I'll be talking about
steam locos here the techniques will work on any locomotive.
When should I make locos
dirty ?
First let's understand how these machines weather. Steam locs are
filled with grease and oil, coal, water and also brave the elements.
Again
remember what you are modeling, if it's era1, then the crews took
great pride in keeping it clean, if era 4 - the last days of steam,
then they where not cleaned at all, a express loc would be washed on a
regular basis, where a freight loc not so. But I digress,
let's first discuss 'removable' weathering.
Non-destructive weathering materials
Two
materials come to mind - watercolors and pastel chalks, both are available
from an art supply store.
Using watercolors
You might remember these from
school (the real one ;-) . They are easy to apply and will wash off as
they are not permeate on metal or plastic. Colors should include black,
white, brown, green, blue , blue or red to simulate fading paint on E or
diesel locs .An inexpensive starter set will have these colors.
Mix say black with water, add a drop of detergent (dishwashing type,
why? this will break the surface so the color will flow on to the model)
now with a soft brush apply to the boiler. This will kill the shine and
give color variations. Use the white for lime stains (anywhere water
could leak out) and the brown for rust stains. You can use the green. The
beauty is that if you don't like the effect you simply wash it off and
let dry, to start over or forget the whole thing! ;-) Using
pastel chalks
It's
another medium which if you don't like can be brushed or washed off. For
a very light effect rub a brush the sticks, then stroke on to the model.
They come in a wide variety of colors, I have two sets: earth tones
and greys (blacks, greys to whites). You'll also find that
you'll use these chalks for all types of weathering so they are great to
have.
Ok - I can do it, but where ?
You might be thinking that's all fine and dandy, but where the heck
Kev do I apply what color?? Let's take a tip from our modeling brother, the military modeler. Military
modelers never start a project
without trying to get at least one photo of the prototype, to check to
see what it looked like. This is always good advise and fortunately for
us we have hundred of books and magazines with countless photos of our
locs. It isn't that important that you find your exact prototype, but to
at least get a feel of what it did (or does) look like so that you can
duplicate the weathering.
Let's look at a steam loc. First, just
the fact that it's a steam loc (coal, oil, grease, water, weather) it didn't
take long for it to show dirt, grime, etc. Notice the boiler, what's that
white streak? That's lime in the water that is staining the boiler, because
there is a small leak. The red/brown? The water has began to rust the
metal. The dull black on the drivers and valve gear?. Dust from the road,
grease from the constant lubrication of the rods, etc? The lighter shade
of green on that e-loc? Fading paint. By studying the photo's and
understanding why you are apply a color you'll have an excellent chance
of making your models more realistic.
For the more courageous...
Now for those who dare (are you out there?) here are other techniques
to make your weathering permeate. The easiest way to make a model more
realistic is to dull the shine of the factory paint. First mask any clear
windows and the headlight lenses. For the lenses, I use 'magic masker',
you
may remember this from our weathering track section. Apply this to the
lenses and let dry(15 minutes), for the windows if you don't want to
remove them is to cut a small piece of masking tape to fit over the
windows. Use a tooth pick to burnish it down around the edges of the
window. Now carefully cut it out with a sharp hobby knife. Get some
Testors (or Revell's, etc) Dull-cote (matte finish), place the spray can in
some warm water for a few minutes (this will warm the varnish so that it
will spray finer and smooth). If you don't have a spray booth, go
outside and spray a several light coats to the model (if doing this to
an e-loc, either remove or mask the pantographs). Keep spraying until the
shine is gone. When dry, remove the masking tape and 'magic masker'.
You'll see this simple step will make the model look more like real
life!
Let's go all the way...
Now for the real daring, lets go all out and really weather our
locs to make them look like the hard working machines that they are.
Step 1
Is to disassemble the model. For steam locs this means taking a
look
at the leaflet that comes with the unit. The boiler is a screw or two,
the
tender can be gentle pried off. For e/diesel locs just the body, and maybe
to
remove any glass, if not use the masking tape method above and don't
forget
the headlights!!. Next pry out the windows from the cab, a sharp hobby
knife, will do the trick, set aside for now.
Step 2
Adding coal to the tender... What does this
have to do with
weathering?? Well if we are going to spend time and energy to weather the
model, we should get rid of that fake coal in the tender! First drill
several
mall holes in the fake coal. Next add some model coal (Woodland
Scenics, Noch, Faller), on some locs I pile it high, on some not so, if some spills
on
the sides, that's ok, the prototype did!! Place on paper towels. Now with an
eyedropper apply rubbing alcohol (drug store item) over the coal. Then
with an
eyedropper apply either white glue mixed 1 to 1 with water, or matte
mixed 3
to 1 with water soak it good and then let it dry overnight. Why the
holes? This let's the excess glue run inside the tender body. Why the
rubbing
alcohol? To break the surface tension of the glue so it will flow all
over
the coal to hold it securely in place.
Step 3
Painting, I airbrush the boiler and tender with Floquil/Polly
Scale
Engine black as this appropriates the original color only in a matte
finish. Other firms make a black that will match. A word of caution: If you
don't have a external mix dual-action airbrush, then you may paint over
the
markings on the loc as you can't control the flow/volume with an
external
mix single-action. But not is lost! Depending on the medium your using
(solvent
based/water based), you have some time to have a brush damp with thinner
to
gently remove the paint from over the markings. Let this dry for at least
24
hours before proceeding, just for safety's sake ;-))
Step 4
Drives, valve gear, bogies. Now this is the
dirtiest part of any
loc! Mud, dust, grease, grime all accumulate here. There is a easy way
to
simulate this: washes. A wash is a very thinned paint that will flow into
all
the nooks and crannies and will dry a little lighter than applied, so you
can
be happy with one coat or build it up to show some real dirt (my
favorite)! I
have used two types of washes, the first is a black wash using India ink
(art
store) and rubbing alcohol. Two strengths A) light, mix one pint alcohol
with
one teaspoon India ink B) heavy mix two teaspoons into a pint of alcohol. With a brush flow this wash all over the
bogies, drivers and
valve
gear. I lay the loc on it's side in a cradle for this do one side at a
time, let it dry and evaluate. Again, one coat of the light might do it or
a
few of the heavy, it's up to you! The second wash is made with paint, I use
solvent based paint as it flows better, but water base is ok if you add
detergent so it will flow. You can determine the intensity of the wash 50/50,10 parts thinner to 1 part paint experiment with what you like,
write
it down so you can duplicate it for your next loc.
Step 5
Weathering, using the mediums like different colored washes,
the
pastel chalks add the rust, stains, etc to the loc. A way I apply rust to
the
cylinders of steam locs is using a product called "Rust
All", it is alcohol
based product what comes in a nice red/brown color. Apply, let it dry,
easy! If
it too 'red' apply a little black wash to tone it down. You can also dry
brush some oily black to the rods and valve gear to that greasy
look.;-))
Step 6
Touch up and reassembly. Give the loc a good
inspection, touch
up where
needed or add more Remove the 'magic masker' and any masking tape.
Replace
the tender, now before I re-glue the windows I take a hobby saw and cut
them
in half as the driver and fireman usually had these slid open so they
could
see the track ahead. That done I re-glue them in place. Now replace the
boiler, looking good?? Give it a test run, now put that beast out on the
road
to earn her keep!
|